Object Code Balances Help
INTRODUCTION
Object code balances are now available in UT Direct, which will allow users to run reports on the information. These reports are similar to those created through the GOM screens in *DEFINE, and they may be viewed immediately. The information can be downloaded to a personal computer and reformatted as needed.
AUTHORIZATION
As with other accounting information pages in UT Direct, the ability to view or use the object code balance screens requires an equivalent *DEFINE authorization. In this case, the user must be authorized for the GOM screens in *DEFINE.
OVERVIEW
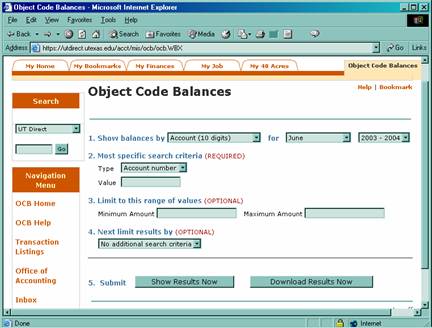
The page first displays the criteria that may be used to select the information you wish to view. Many of the fields provide pull-down menus, while others provide free-form fields. After all of the criteria have been provided, you may view the balance information on the web or download it to your computer.
REQUIRED CRITERIA
First, you must make a selection from each of the following criteria:
- An Account Group (2 digits), a Budget Group (8 digits), a full Account Number (10 digits), OR a General Ledger Account (6 digits).
- Month: September though August, Post-Close (13th month in *DEFINE) or Balance Forward (14th month in *DEFINE).
- Fiscal Year.
After you select the criteria, make a selection from the following pull-down menus:
- Type: Account Number, Object Code, OR Transaction Type.
- Value: Actual number, code, OR transaction type (free-form field).
If this is the only criteria you need, you have 2 options for submitting the information to be viewed. You may click Show Results Now or Download Results Now.
OPTIONAL CRITERIA
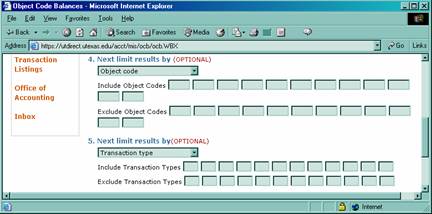
You also have the option of selecting an option from the Next Limit Results by pull-down menu, which will allow your information to be displayed in more detail:
- Minimum and/or Maximum amounts to be displayed
- Include up to 12 object codes and/or exclude up to 12 object codes
- Include up to 12 transaction codes and/or exclude up to 12 transaction codes
When you select Object Code, the page will display the additional free-form fields to enter the information; when you select Transaction Type, the screen will display the additional free-form fields to enter the information.

After you have selected either Object Code or Transaction Type, another selection window will appear to provide the option of selecting all criteria.
After you have selected your criteria, you have 2 options for submitting the information to be viewed. You may click Show Results Now or Download Results Now.

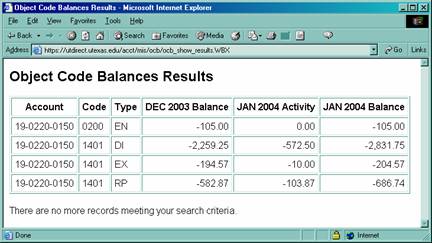
If you click Show Results Now, a separate window will immediately appear with the information you've requested. Your search criteria will still be on the other window.

If you click Download Results Now, a warning window will appear:
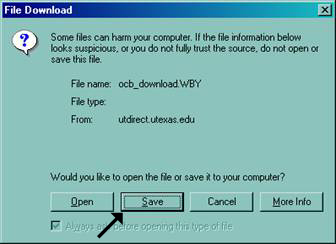
Click Save, then select the folder you wish to save it to, and make a note of the name of the file.
Launch Microsoft Excel and from the File menu, select Open. Navigate to the folder where you saved the document, and open it. From the Open dialog box, you might need to change Files of Type to All Files in order to see the file you just downloaded.
The Excel Text Import Wizard will open.
Step 1: Confirm that your data is Delimited by clicking Next.
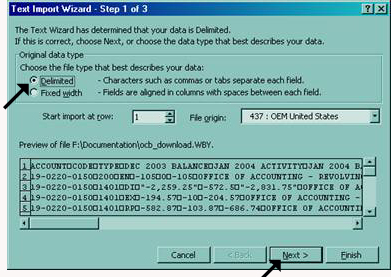
The following window will appear:
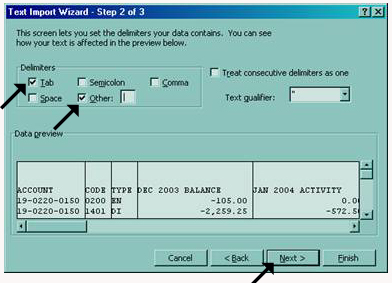
Step 2: Select Tab and Other. Enter | in the Other text box, and click Next.
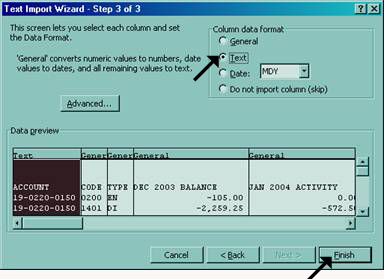
Step 3: Select Text, then click Finish.
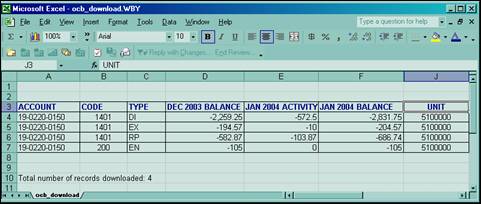
You will see the report in delimited columns, and much more data will be displayed in the document than you can view on the web. Categories of information may include account, object code, transaction type, balances, account title, object code title, budget group status, unit code, report unit, sponsor code, fund group, NACUBO code, federal code, 5 reporting codes, beginning and ending fund dates, beginning and ending project dates, fund method, and detail.
When you first open the document with Excel, it will resemble the following:
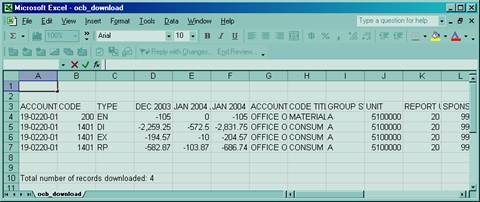
Format the spreadsheet as desired: